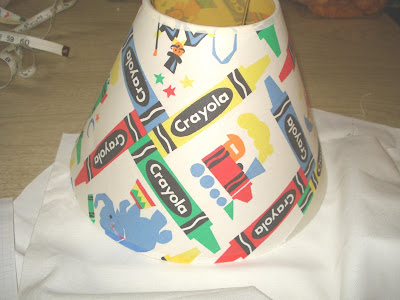
I found this lamp at a yard sale for $5. Forgive me, I didn’t get a pic of the original lampshade and the base together. I wanted a white shade with some sort of rubber ducky theme on it. Maybe some yellow bric brac on the edges or other binding. When I draped the white fabric over the original lampshade, I could see the crayon design. I decided to try to peel the fabric away from the fragile plastic underneath. Yes, that was silly…. Sorry, no pictures of that failure attempt!
I started to research what the plastic lining was on a lampshade since I had to start fresh. Turns out it is styrene. I found various styrene sheets at websites such as Hobby Lobby. Instead of paying for shipping, I decided to seek out the Hobby Lobby store in the area because I have never been there. When I got to the Hobby Lobby store, I looked up and down every isle and found every kind of sheet but styrene. However, when I was shopping in the fabric department, I found a huge sheet of plastic for $3.99. I bought 2 sheets-just in case.
So the first thing I did was to finish tearing off the old shade from the wire frame and also trying to keep it in tack. Then I cut the old lampshade in half from top to bottom and traced it on the plastic sheet. Give yourself a little extra on all sides to overlap. If you have too much in the end you can always trim. I repeated the tracing and cutting onto my fabric. Again give yourself extra fabric for wrapping around the plastic liner. Next, play with the plastic liner on the wire frame until you get it even. Secure with clothespins. Cut the plastic liner if necessary at the top and bottom to make the circle a bit more even. Then, secure again with scotch tape. Wrap your fabric around the plastic liner and make sure it fits and you have enough fabric cut. Start near the middle of the shade and spray the plastic liner and smooth the fabric with your hand. Keep going around and repeating the spray and smooth process until you get to the edges. Then, fold the edges to a pretty seam. After that, fold the edges over, secure the fabric with spray adhesive and then clothes pins. I then added some rubber ducky 3D stickers. Later, I plan to add some yellow edging but I haven’t decided exactly what yet. Here are some tips on things I learned after 2 shades: 1. Test your spray adhesive to make sure it sprays clear. I had to make 2 shades because of this. 2. Iron your fabric before you begin to smooth it out because you can see the fold seams on my shade. 3. Have extra plastic and fabric!! If you look at my shade long enough you can see some inconsistencies such as the fold lines, uneven bottom etc etc. That is okay. It is a learning process and I am happy with the outcome. Next time, maybe I will double up on the white fabric to overlap the dark lampshade to make things a little easier on myself.
Total Cost= $23
Lamp/shade= $5
Plastic $8
Fabric $4
Rubber Ducky 3D stickers= $4
Clothes Pins $2
Not exactly cheap but customized for the rubber ducky nursery!


No comments:
Post a Comment
Note: Only a member of this blog may post a comment.